
A 3D-printed sample is the first physical reality check before your design moves into metal.
The digital model may look correct on a screen. The printed sample will show how the piece actually feels, fits, sits, and functions. It will also reveal issues that are difficult to judge from a rendering alone.
Before you approve the model for casting, inspect it carefully. A small revision now will be easier and less expensive than a correction after precious metal has been committed.
At Digital Jewelry Design, our US-based design approach combines CAD precision with practical bench-work knowledge and modern jewelry trends. We design for production, not just for attractive screenshots.
Start With the Big Picture
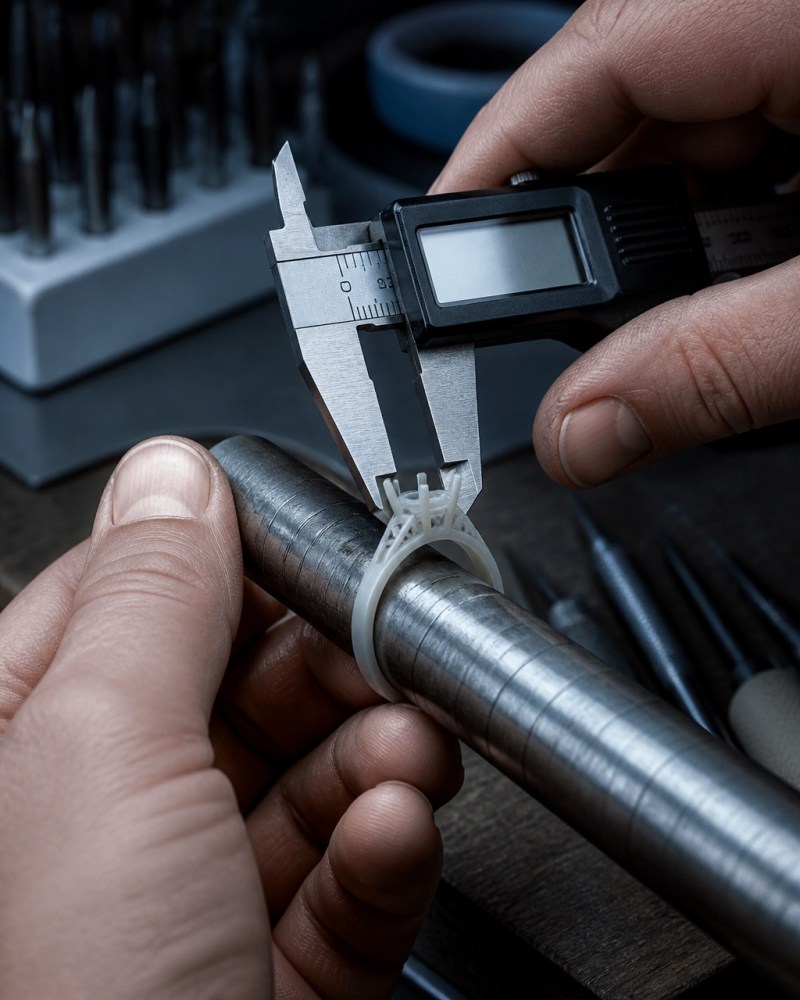
Begin with the overall proportions and silhouette.
Hold the sample from several angles. Look at it from the top, side, and front. Then place it on your hand or a ring mandrel.
Check:
- Is the center stone the right visual size for the band?
- Does the band look too thin, too heavy, or properly balanced?
- Is the setting too tall?
- Are the shoulders symmetrical?
- Does the design match the approved concept?
- Does the piece look balanced from every direction?
A ring can look excellent in a CAD viewport but feel oversized when held in the hand. The sample gives you a more realistic understanding of scale.
Key takeaway
Review the silhouette before reviewing the details. If the overall shape or proportions feel wrong, identify that first.
Confirm Ring Size and Finger Fit
Place the printed ring on the intended finger. If possible, test it at different points during the day. Fingers can change slightly with temperature and activity.
Check whether the ring:
- Slides over the knuckle without excessive force.
- Sits comfortably at the base of the finger.
- Feels too loose or rotates easily.
- Pinches on the sides.
- Leaves enough room for a wedding band or stacking ring.
- Sits at the intended angle on the hand.
A sample should also be tested on a properly sized ring mandrel. This helps confirm the internal diameter and identifies obvious sizing issues.
Do not judge fit only by looking at the ring. Wear it for several minutes. Move your hand. Make a fist. Hold a phone. Notice whether the ring shifts, presses, or catches.
For a custom engagement ring design, finger fit is part of the design, not an afterthought.
Key takeaway
The correct size must feel correct, not simply measure correctly.
Check Stone Seating and Clearance

If your sample includes a stone setting, inspect the setting geometry closely.
The stone should sit level, centered, and at the intended height. Check that the seat matches the stone shape. A round stone, oval stone, princess-cut stone, and pear-shaped stone will each require different geometry.
Look for:
- Correct stone size and shape.
- Proper prong placement.
- Adequate space around the girdle.
- Clearance for the pavilion.
- Strong connections between the prongs, gallery, and shank.
- Access for the setter’s tools.
- No areas where the stone appears to rock or sit unevenly.
The printed sample may not hold the actual gemstone with the same precision as a finished metal setting. It is still useful for checking the position, height, spacing, and general setting structure.
A jewelry designer with bench-work experience will also consider how the casting will be cleaned up and how a setter will access the stone. A setting that looks elegant but leaves no practical working room may require revision.
Key takeaway
Review the setting as a working structure, not only as a visual feature.
Test Comfort and Snag Risk
Run your finger over every edge.
Pay particular attention to:
- Prong tips.
- Decorative corners.
- Under-gallery edges.
- The inside of the shank.
- Raised details.
- Cutouts and openings.
- Areas that contact adjacent fingers.
Ask yourself:
- Does anything feel sharp?
- Does the setting rub against the neighboring finger?
- Could the design catch on clothing or hair?
- Does the ring feel top-heavy?
- Is the profile comfortable when the hand bends?
- Does the ring sit securely without twisting?
Some sharpness may come from the print itself. Support removal can leave small artifacts or rough areas. Still, any uncomfortable geometry should be reported before casting.
A finished metal piece can be polished and refined, but polishing cannot correct every structural problem. An overly sharp corner, excessive height, or awkward contact point may require a CAD revision.
Key takeaway
If it snags, rubs, twists, or feels unbalanced in the sample, speak up before approval.
Evaluate Balance and Weight Feel
A printed sample will not have the same weight as gold, platinum, silver, or another casting metal. Do not use the print to predict final weight exactly.
You can still evaluate balance.
Place the ring on your hand and observe:
- Whether the center section pulls forward.
- Whether the ring rotates.
- Whether the band feels visually and physically balanced.
- Whether the setting appears too dominant.
- Whether the underside supports the design properly.
- Whether the piece sits naturally on the hand.
For larger custom jewelry designs, the print can also reveal whether the piece feels bulky or awkward in motion. Lift your hand, turn your wrist, and view the piece in normal use.
Key takeaway
Use the print to judge balance and behavior, not final metal weight.
Know What the Print Can, and Cannot, Show
The sample can help you judge:
- Overall proportions.
- Silhouette.
- Scale.
- Ring size and finger fit.
- Setting height.
- Stone position.
- Clearances.
- Comfort.
- Balance.
- Visibility of design details.
- Potential snag points.
The sample cannot show the final appearance of the metal.
The print surface may show layer lines, support marks, small pits, or a matte texture. These are not necessarily defects in the finished jewelry. Casting, filing, sanding, polishing, plating, and other finishing processes will change the surface.
Do not approve or reject a design only because the print does not look shiny. A resin or wax sample is a production reference. It is not a finished jewelry surface.
However, do not ignore geometry because you expect finishing to improve it. Finishing can refine a surface. It cannot reliably repair incorrect proportions, insufficient clearance, poor stone placement, or an uncomfortable profile.
For broader background on how printed patterns connect with investment casting, see this guide to jewelry 3D printing.
Key takeaway
Judge geometry, fit, and function from the print. Judge surface finish from the final metal finishing plan.
Give Clear Feedback for Revisions
Vague feedback slows the process.
Instead of saying, “It feels off,” identify the exact issue and the requested change.
Use this format:
- Location , Identify the area.
- Problem , Explain what feels wrong.
- Change , State what you want adjusted.
- Reference , Add a photo, marked-up screenshot, measurement, or comparison.
Examples
- “The center setting feels too tall on the finger. Lower the profile while keeping the stone height required for the pavilion.”
- “The left shoulder appears heavier than the right from the top view. Please restore symmetry.”
- “The inside edge of the band rubs against the neighboring finger. Round and soften this contact area.”
- “The ring rotates toward the palm. Please review the balance between the center setting and shank.”
- “The oval stone appears slightly off-center. Recheck the seat and prong alignment.”
- “The side gallery catches on fabric. Reduce the exposed corner and maintain the intended open design.”
Take photos from the top, side, and on the hand. Mark the problem directly on the photo when possible. Reference the current revision so everyone is reviewing the same file.
Key takeaway
Describe the location, the problem, and the requested change.
Use Your Included Sample Print
Every Digital Jewelry Design service and membership tier includes:
- 2 to 4 high-resolution photorealistic images
- 1 turntable animation video
- Unlimited revisions
- 1 sample 3D print for trial on
- The final STL file for the casting shop
The sample print exists to help you make an informed approval decision. Use it. Try it on. Inspect it under good lighting. Ask questions before the design moves to casting.
Our process combines digital jewelry design, modern CAD modeling, and practical production thinking. The goal is not simply to create a model that looks good on a screen. The goal is to prepare a design that can be worn, set, finished, and produced successfully.
Final Approval Checklist
Before approving your 3D-printed jewelry sample, confirm:
- The proportions and silhouette match your expectations.
- The ring fits the intended finger.
- The design sits correctly on the hand.
- The setting height feels appropriate.
- The stone position and clearances look correct.
- The prongs and supporting structure appear practical.
- No edges snag, rub, or create pressure points.
- The piece feels balanced.
- You understand that the print surface is not the final metal finish.
- All revision requests have been addressed.
Review carefully. Approve confidently.
The Art of Precision
Digital Jewelry Design will help you move from concept to production with clear communication, practical feedback, and a design workflow built for real jewelry.
The website is currently under development. To discuss a custom jewelry design, contact sales@digitaljewelrydesign.com, text 6029217150, or reach out through Facebook.
The Art of Precision.